The Bluewren Photo Record Tool (PRT) App…
User Guide
Following this guide should allow you to effectively use the Bluewren PRT soon after you have set your password via the invitation Email, and downloaded it from the Apple or Google store. Be sure to give the App all of the necessary permissions (location, camera, etc) on your smartphone to ensure full functionality. Don’t forget to also first set up a Photo map for your records using the Bluewren Manager.
If you’re returning you can quickly get to the relevant section of this guide through the following links, and back here using the ^top link at bottom right of each section.
Getting started and Login
Before you log in to the PRT App your administrator should have set up a Project with a Photo map for you to store your photo records. Ideally there should already be a tags set for classifying the photo records, but this is not essential, a tags set can be created later and tags added or amended for already captured images using the Editing Tool
If any fo the above has not been done yet then refer to the Bluewren Manager guide on how to create a Project with a Photo map and Tags set.
If you already have a Photo map that is set up, you’re ready to login…
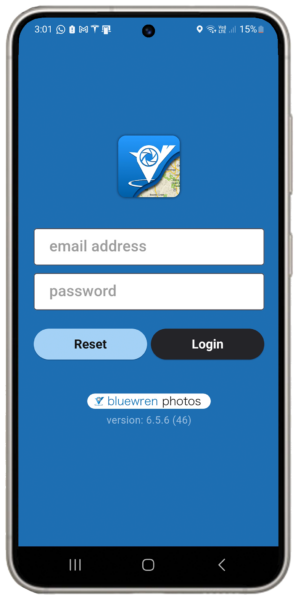
Type in the Email address used to receive the App invitation, and your password.
If you’ve forgotten your password, don’t panic, there is a link on the left of the login screen that will enable you to easily reset it.
If you don’t receive the invitation to reset your password, check your spam folder, or if you still can’t find it, talk to your IT people as it may be hidden by another spam filter.
Adjust settings… or not

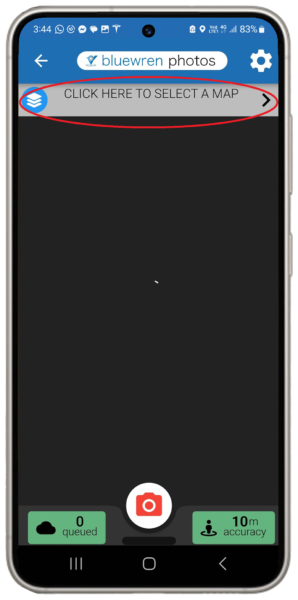
Once your Photo map has been set up you don’t need to do anything to start capturing images, but if you want to customise your PRT experience, tap the Cog symbol (top right, example circled in red) at any time to open SETTINGS.
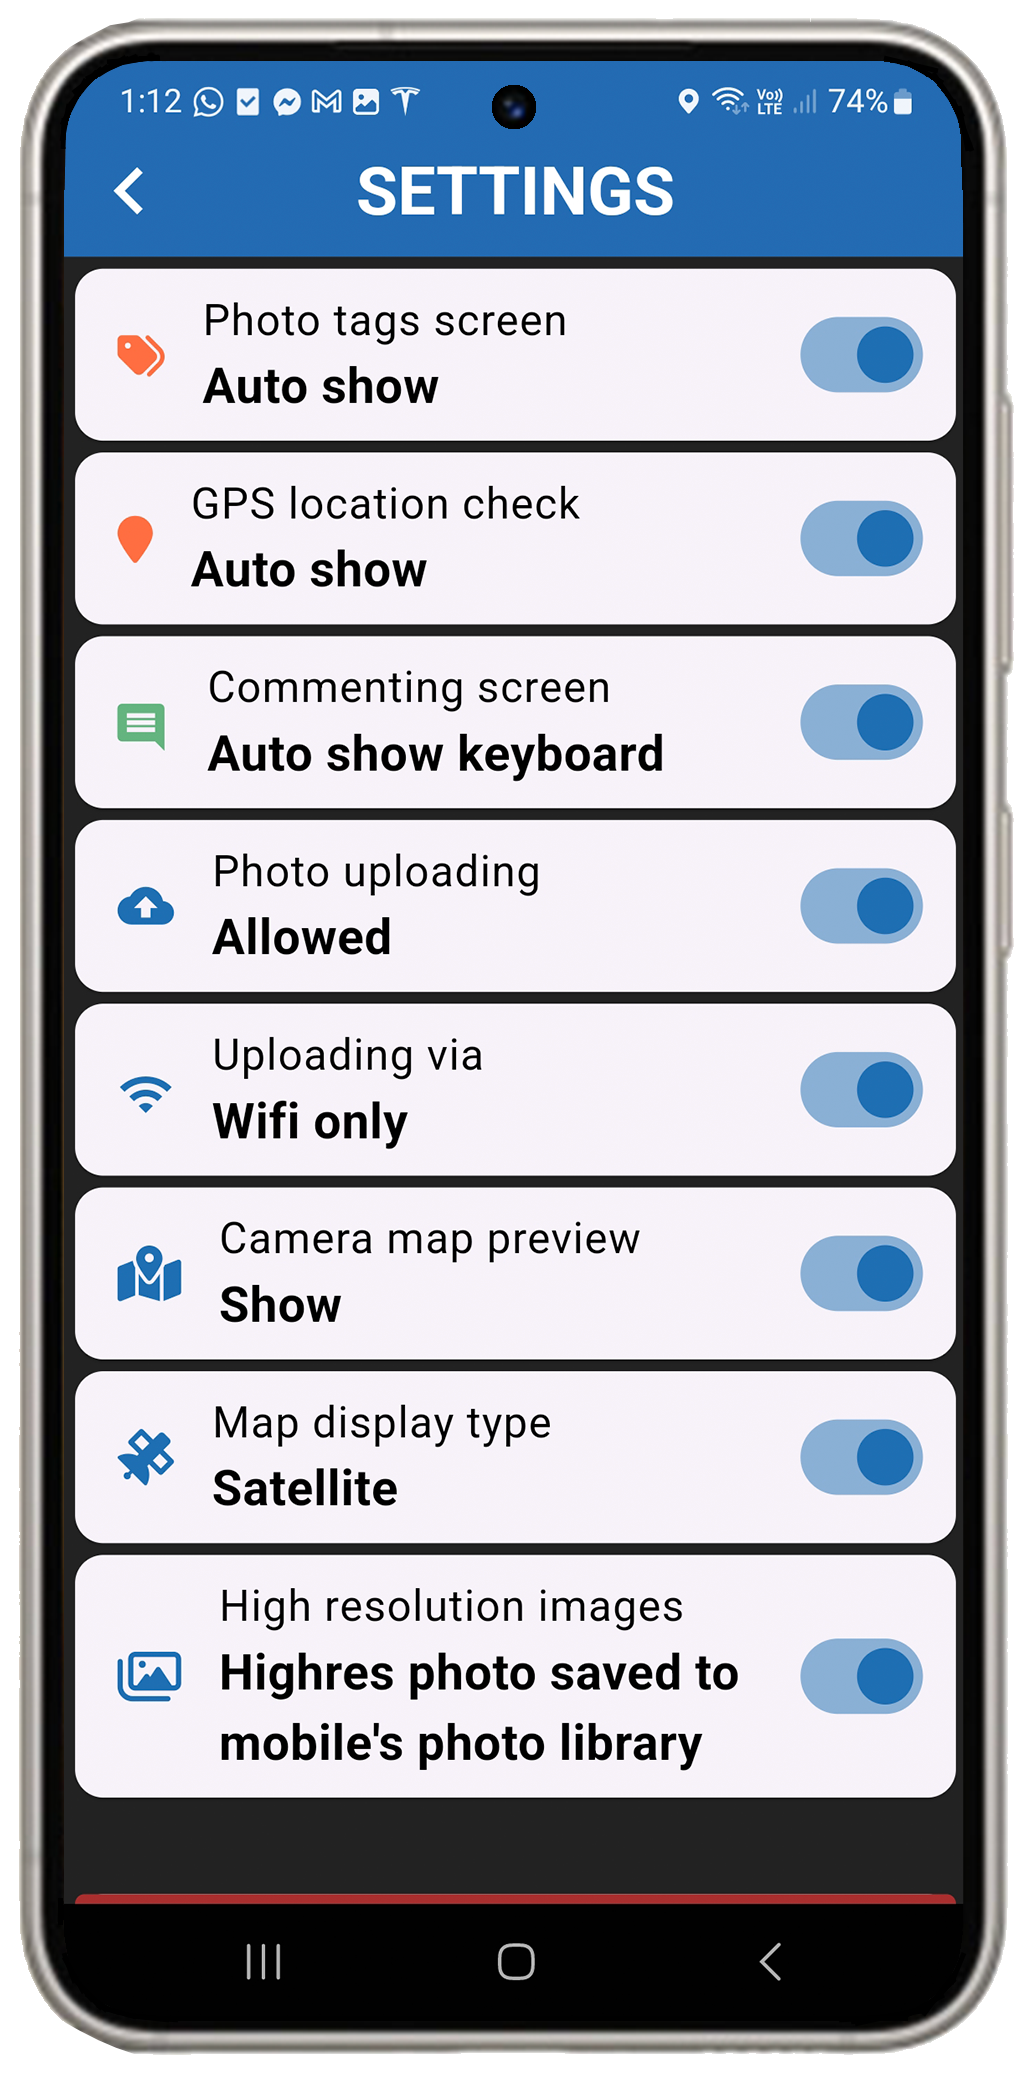
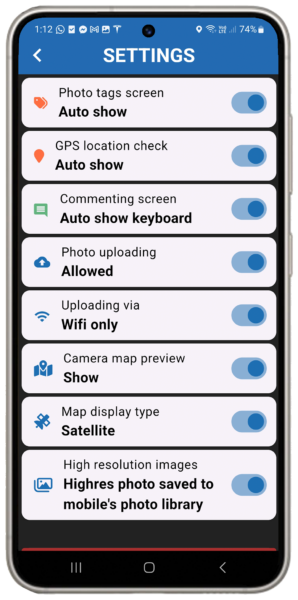
You can then adjust the toggles to configure how you would like the interface to function while you capture and classify photo records.
All options toggled right are shown, full detail on each setting toggle alternative is here
For the best experience we recommend adjusting the settings as it can dramatically reduce the time taken to capture images or allow easier recoding of information depending on what you are targeting in a particular session.
Choose the Photo map and group for storing the Photo records
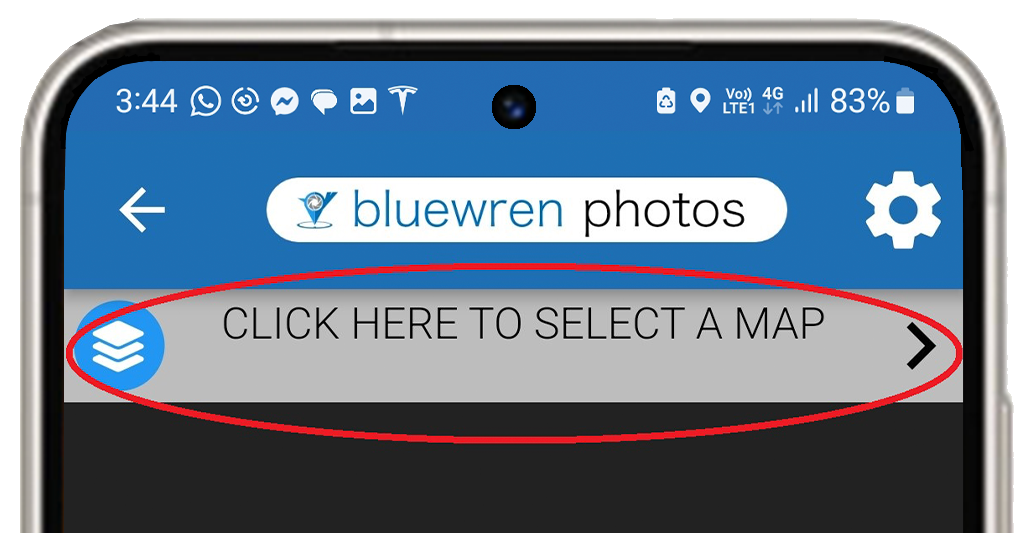
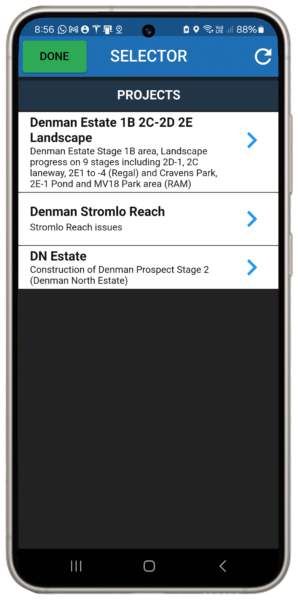
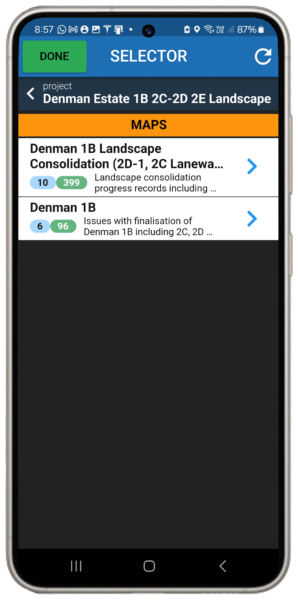
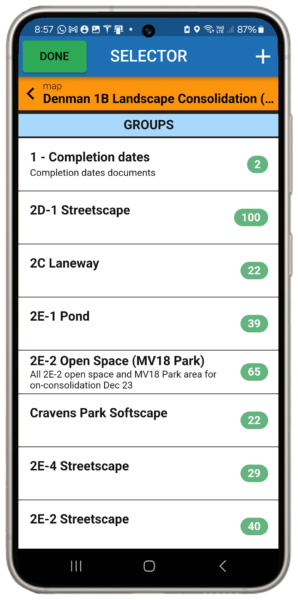
When logged in choose the Photo map and group by tapping on the top bar (circled in red). This bar is tapped to show the Project(s) then select and move through to the desired Photo map and Photo group by tapping on the selection. See example sequence of screens below.
Note that Projects and Photo maps can only be created using the Bluewren Manager. Photo groups can be created in the App.
The shutter release button will remain red until a Photo group is selected or created.
The rotating circle symbol at the right of the SELECTOR bar will refresh the lists (see examples below).
To create a Photo group tap on the + symbol, right of the SELECTOR bar to create a group (last 2 examples)
Capture and classify the image to create the photo record
Frame and capture the image
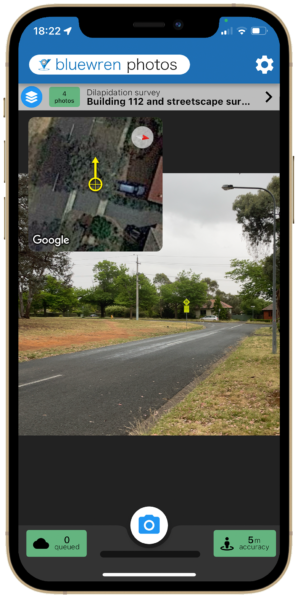
Now you have selected the Photo group for the photo records, its time to get to it; just frame the picture and tap the shutter release button at the bottom of the screen.
Before you take any pictures, for accuracy of location, it is best to wait until the bottom right accuracy indicator is ideally 4-6m or less. Accuracy will depend on the phone model or tablet in use. Note tablets without a SIM card generally have very low location accuracy.
The example has the Camera map preview setting toggled to “Show” and Map display type setting toggled to “Satellite”.
Tapping the camera map preview inset (top left of screen) while framing the picture will show the map preview full screen for better appreciation of your location and angle of view that will be recorded automatically when the picture is taken (this can be adjusted refer below). A single tap on the screen will take you back to the camera view.
GPS Check location
When you have taken the picture the LOCATION CHECK screen will appear by defauly if you have the GPS location check setting “Auto show”, if set to “Manual show” the same full screen can be opened to allow location adjustment by tapping the map preview (top left of screen) after the image is taken.
The location and angle of view can then be adjusted on screen if necessary to better represent the location. This can be an issue if you are near buildings or other influences that may affect the accuracy of the GPS signal or angle of view.
The centre of the yellow cross hairs shows the location where the photo will be recorded as taken. The arrow shows the angle of view. Both may be adjusted on screen referencing the satellite map if the location / angle of view is unacceptable
Tap “ACCEPT” or make the required adjustments then “ACCEPT”, if you have moved the location but wish to see the GPS location when taken again, tap “RESET” to restart the location adjustment process.


Include Tags
After capturing the image its time to classify and add comments to make a photo record. If you haven’t created a tags set you can still take images and use the Editing Tool to add the tags / sub-tags later.
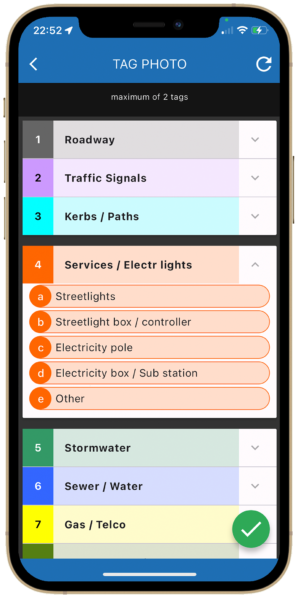
If the Photo tags screen setting is toggled to “Auto show” the TAG PHOTO screen will show to allow tag selection. A maximum of two tags can be selected and will appear at the top of the screen when selected. Tapping the X on the right side will remove the selection and allow selection of another. If there are sub-tags, tapping a tag will reveal the sub-tag for selection.
If the Photo tags screen setting is toggled to “Manual show” the next screen will be the photo as taken and all record information associated with the image can be adjusted in this screen including adding comments, prior to SAVE (uploading).
Add comments

Comments are a powerful way to provide additional information about an image for future retrieval / identification through the search function in the Photo Viewer and the Photo Album if purchased.
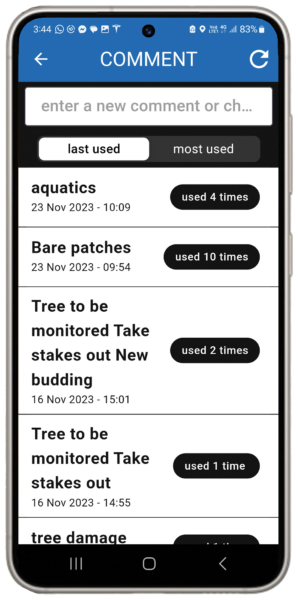
Comments may be recorded after image capture before save, simply tap the line with the green circle (see above). On tapping the line the COMMENT screen will appear with previous comments shown (if any). The number of times the particular comment has been used in the Photo map and the date / time last used is also included.
Scroll down to see previous comments, any may be selected with a tap, and amended by tapping the comment line again to show a keyboard and the cursor moved to modify existing comments.
If the Commenting screen setting is toggled to “Auto show keyboard”, the keyboard will show on first tap of the comment line. If not showing, tap in the top line to make the keyboard appear to amend or allow addition of a new comment.

Make any adjustments and save
If you’re not happy with the picture you can tap ‘CANCEL’ at this stage and start again or if you wish to amend any of the the inputs including the tags, comments or the location, tap on the relevant area of the screen and make the adjustment.
You can also change the photo group, or even the photo map or project at this stage by tapping the top bar to show the SELECTOR screen. The appropriate amendment can then be made (see here) noting the photo group selected (or new photo group created) will be the default for the next photo record captured unless amended.
Tapping the location inset will show the LOCATION CHECK screen to allow further adjustment.
When satisfied with the inputs and the picture tap ‘SAVE’.
If the Photo uploading setting is toggled to “Allowed” and the Uploading via setting is toggled to “Wifi and Mobile” data (recommended) the photo record will upload immediately. If set to “Wifi only” the photo record will be held on the device until you are connected to Wifi. The green “queued” box (bottom left) will turn red and show “paused” with the number of photos awaiting upload. Tapping on the box will show the photos awaiting upload with their details.
When the upload is shown as completed, photo records are visible through the Photo Viewer within moments to anyone with the Photo map link. Note that if the Photo Viewer is open, a refresh will be required to view the newly uploaded photo record.

Pausing and tracking uploads
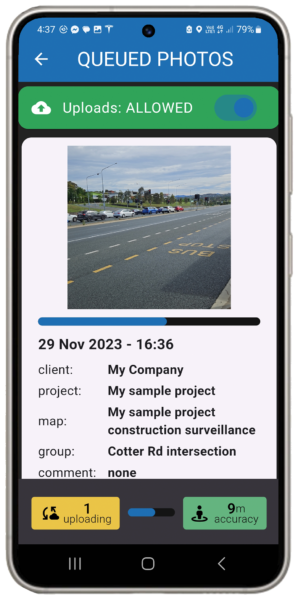
When a photo record is saved the “queued” box at the bottom left of the screen will turn from green to yellow and change to show “uploading”. Tapping the yellow box will show the QUEUED PHOTOS screen and details of the photo that is uploading (as shown).
Upload progress is shown by the blue bar in the bottom middle of the screen.
If the Upload setting is toggled to “Wifi only” or if you have “Wifi and mobile data” selected and are in an area of poor mobile signal, the yellow box will show the number of photo records waiting in the queue until mobile signal is restored.
Upload may be paused at any time by toggling the Uploads ALLOWED bar at the top of the screen and it will turn red along with the “uploading” box (lower left) and the number of photos in the queue will be shown. The photo records will remain stored in the PRT App even when closed and uploaded at a later time when the PRT App is restarted.
If photos are not uploading, tapping the “uploading” box and toggling the Uploads ALLOWED bar on and off may help resolve the issue.
Settings explained…

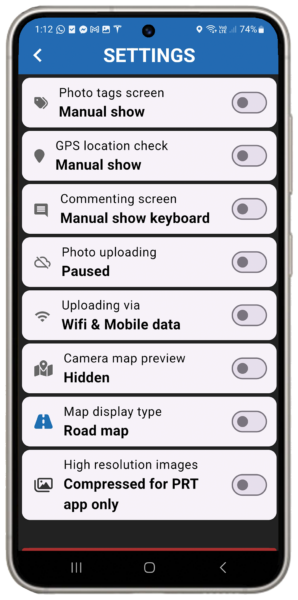
Clicking on the Cog at the top right of the screen (circled in red above) will open the settings screen that allows adjustment of a number of options for your Bluewren PRT experience.
All of the toggled options are shown and each is explained below.
Scroll down in the settings window will allow clearance of data and logout, refer further below.

Photo tags screen
Toggle left will allow a tag to be added by tapping in the tag line before saving the photo record.
Toggle right will add the step of tagging a photo after confirming location.

GPS Location Check
Toggle left will allow adjustment of photo record location and angle of view check by tapping on the GPS location window at the top left of the screen after the image is captured, prior to saving.
Toggle right will show a full screen GPS location check by default as an additional step after the taking the photo.

Commenting screen
Toggle left will show previous comments only for selection and the keyboard will pop up when tapping in the new comments box.
Toggle right will show the keyboard by default when the commenting screen is selected allowing direct type in of new comments.

Photo uploading
Toggle left will pause uploading and captured photo records will be stored on the device until upload is allowed by toggling this setting right.

Uploading via
Toggle left allows upload by Wifi or Mobile data when either of these connections are available.
Toggle right allows upload via Wifi only and captured photo records will be stored on the device until a suitable Wifi connection is established.

Camera map preview
Toggle left will hide the camera map preview box when framing images with the camera.
Toggle right will show the camera map preview box in the top right of the camera screen. The size of the preview box will depend on your devices screen zoom settings.

Map display type
Toggle left will show an open source streetmap as the background in the Location screen (and Camera map preview box when toggled on).
Toggle right will show a satellite view in both instead.

High resolution images save
Toggle left will only upload images with the photo records, no images are stored on the device.
Toggle right will both upload images and store a high resolution image on your device for other use. For android devices images can be found in internal storage/pictures as a .jpeg with the Photo map and group included in the file name. The image is also avaiable through the gallery. For apple devices the image is stored in the photo role.

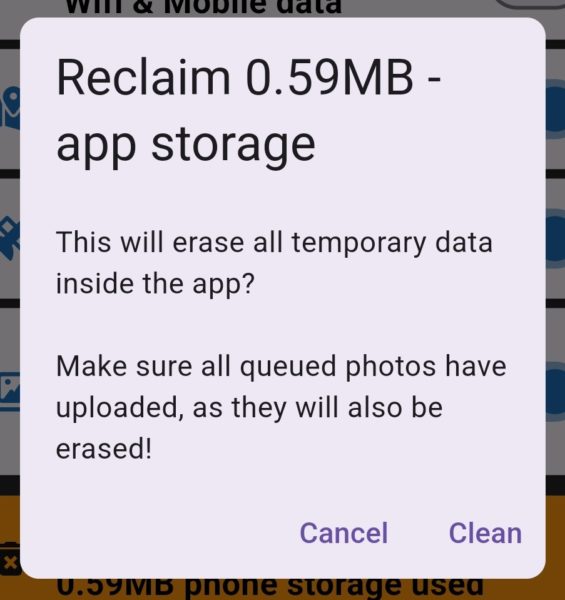
Tap on this box will enable deletion of temporary data associated with the Bluewren PRT App that may have been left uncleared by a crash etc. The phone storage will also show as greater than zero if photo records are pending upload and as per the warning box, data should only be cleared in this instance if the queued photos require deletion.

Tap this box to Logout. You can log in again at any time with your email address and password. There is a link on the login screen that enables password reset if forgotten.

