Bluewren Manager – User guide
The Bluewren Photos Suite has many useful features for capturing and classifying images to enable remote monitoring and collaborative work on projects. The Bluewren Manager is the administration interface that allows sign up and an administrator to invite people to create and edit maps, choose tag sets for classification and other information for the effective use of the Suite. The key elements are:
At the end of each guide section you will see a ^ top at the bottom right which will bring you back here, you can then quickly refer to other sections if you need.
Getting started….
….the Suite is now fully functional and ready for use, you can view the pricing tables for our special introductory monthly or annual subscriptions here and if you want to get onboard contact us and we can provide you with a login to organise a free trial, or subscription…. then you can set up and go for it with the Suite….
Setting up the Suite
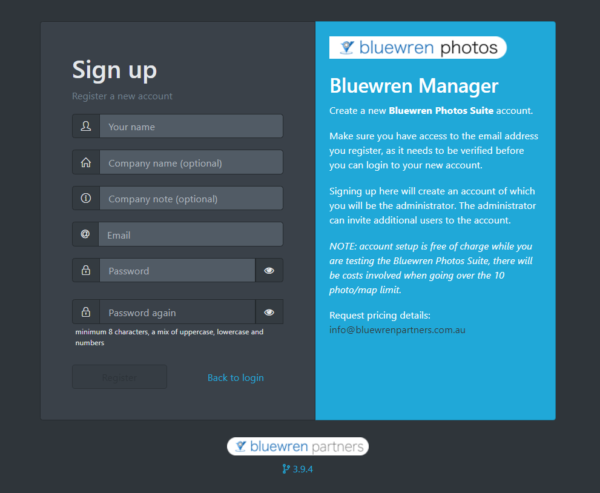
When you’ve opened an account, you will need to have an understanding of how the Suite works. The information to help you navigate through getting the best out of your photo records follows and is always available for future reference, but first read on for advice on how to set up quickly to start capturing and classifying photo records for future reference.
The steps below will allow you to set up a photo map and the classification system for you and the others invited to create photo records to use .
- Inviting people to use the Suite
- Setting up Projects and Photo maps
- Classification system – Tags sets
- Map settings and positioning
While setting up you may wish to learn more and refer back to the following sections of the guide.
- Access levels
- Bluewren Manager overview
- Adding an Overlay and setting initial visibility
- Photo Map listing line buttons
We are also available to assist you in setting up or for any queries, just contact us.
Access levels
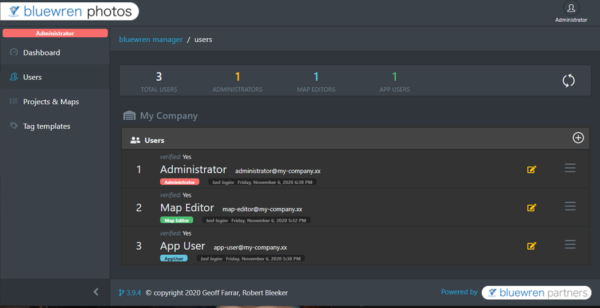
The Bluewren Manager is the administration interface that forms the backbone of the Suite and has a different appearance to people dependant on their access level.
There are three access levels:
- administrator – the person that signs up and manages all aspects of the Suite including inviting others, setting access levels for projects and maps, and the person responsible for payment. The administrator has “access to all areas” and can undertake all available functions.
- map editor – a person invited by the administrator, able to adjust map information including amending a classification system, load overlays, view maps, obtain map links and edit photos and metadata through the Bluewren Manager. Photos can be taken and classified using the Photo Record Tool.
- app user – a person invited by the administrator, able to view maps and obtain map links using the Bluewren Manager. Photos can be taken and classified using the Photo Record Tool App.
Bluewren Manager overview
The Bluewren Manager has the following features:
- On the left you see the Main menu that includes:
- Dashboard – (visible to all users) an overview of the statistics on the use of the Suite including the number of projects and associated maps, number of views and searches. Data on use may be searched over pre-set time periods or a custom range. (Available to all access levels)
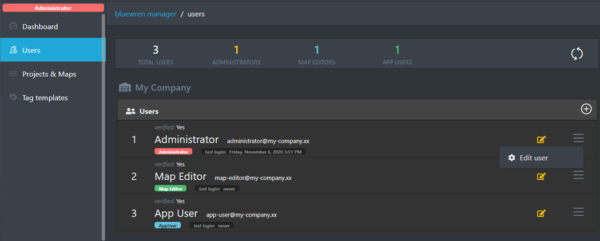
- Users – (Only visible to the administrator) provides a listing of the people who have been invited to use the Suite (Email addresses) and their colour coded access level. A listing of the numbers of each access level is also shown and the three bars to the right enable editing of access level, deletion or disablement of a person. The plus sign on the right is the way to invite a person to become part of your Bluewren team.
- Projects & Maps – (visible to all users) Projects may have single or multiple maps and allow a way to control access to groups of maps.
- Tag templates – (Only visible to the administrator) Tags are used as the classification system for future reference and fast photo finding. There are a number of publicly available tag sets for pre populating Photo maps when created or edited tags sets developed for other Photo maps may be saved as templates on other projects. More detail on how to do this is found here
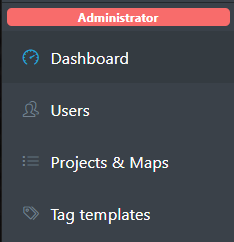
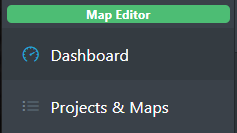
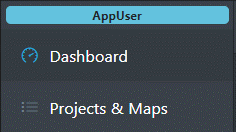
- Above the main menu the access level of the person logged in is shown and is colour coded to the access level
- administrator – red
- map editor – green
- app user – cyan
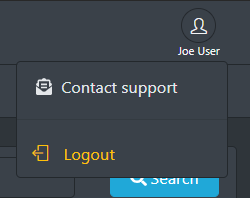
- At the top right the name of the person logged in appears. Click to contact support (via email) or to Logout.
Inviting people to use the Suite
Once logged in to the Bluewren Manager the administrator may invite people to join the photo recording team
- open the Users tab and click on the plus sign in the circle on the far right side of the Users header
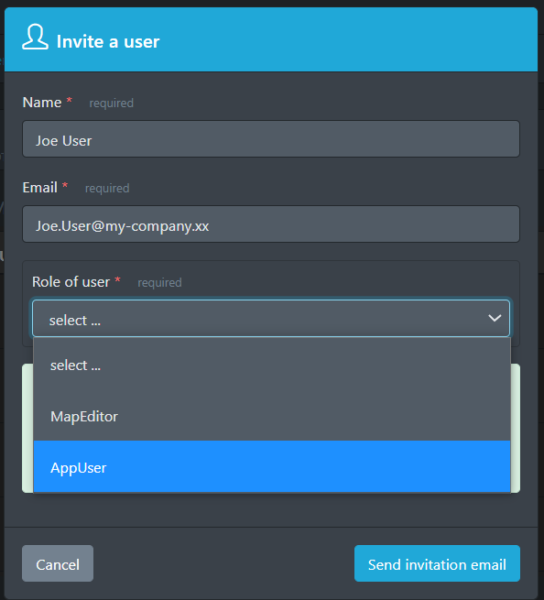
- an “Invite a user” pop up will appear for inclusion of the Name of the person to be invited and the Email of the person to be invited.
- the Name is shown on the top right of the Bluewren Manager when the person is logged in. It also appears to show who took photos in a photo group when opened in the Photo Viewer
- the Email is used for login to the Bluewren Manager and Photo Record Tool App and provides the means of traceability on who has taken photos on Photo maps
- the access level is then selected from “Role of user” pull down (App User selection shown)
- click on the “Send invitation email” button and an email that includes a button that when clicked link to allow the invited person to choose there own password.
- the password must be at least 8 characters and contain a number and a capital letter
- once the password is set, the new team member may login to the Bluewren Manager and Photo Record Tool App
Setting up Projects and Photo maps

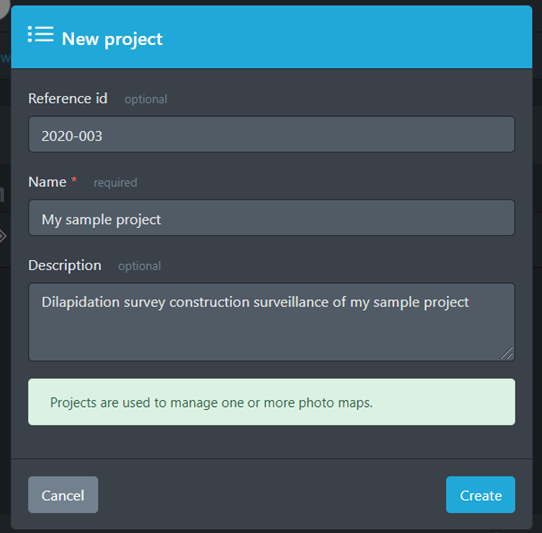
The administrator can create Projects and Photo maps. A project can contain just one Photo map or as many as required. To set up a Photo map:
- after login to The Bluewren Manager by the administrator, click on Project & Maps in the Main menu
- to the top right you will see a plus sign in a circle, clicking on this will open the “New project” pop-up
- enter the “Reference id” usually a project or job number for your businesses reference if required – this is optional and can be left blank
- the “Project Name” and “Description” must be completed – these will appear in the Project listing when you click on Project & Maps in the Main menu
After creating a project the administrator can create a Photo map.
- a list of options will appear, select “Create a Photo map”
- the “Create a Photo Map” pop up will appear
- populate the pop up with the details of the Photo map
- a “name” is mandatory and it will appear in the Photo map listing and at the top of the Photo map in the Photo Viewer
- including a “description” is optional and if included appears as further explanation under the “name” in the photo map listing
- the classification system known as Tags sets can be created through adoption of tags from a tag template by clicking on the “Populate tags from a Tag set template” pull down or left to be created later, for details refer below
- the default position for the aerial map when using the Photo Viewer should be set now, refer here

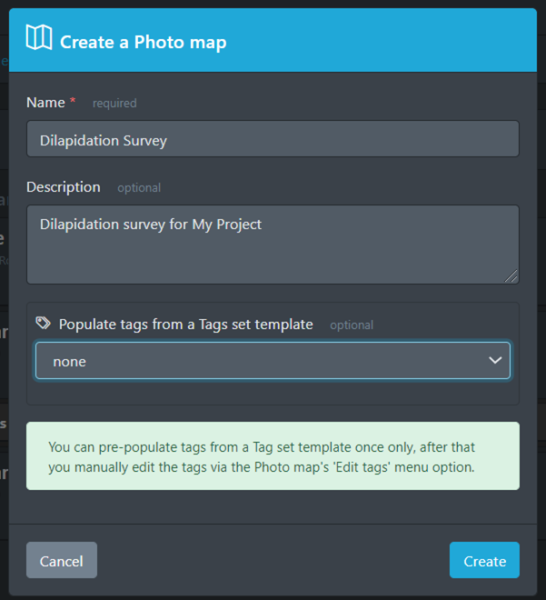
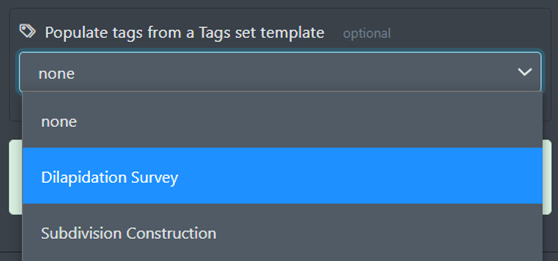
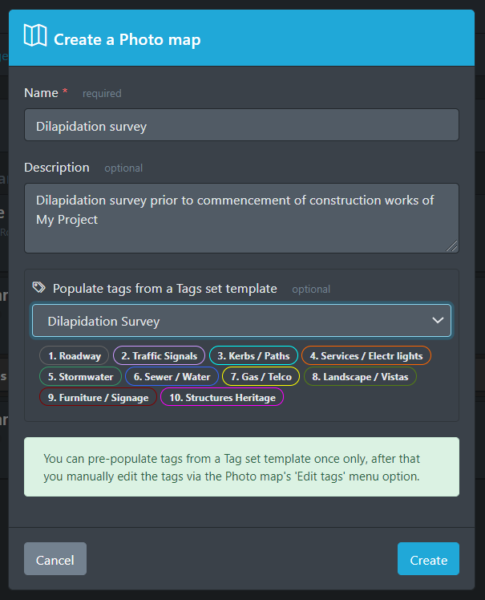
- the “Populate tags from a Tag set template” pull down may be left blank (none) and tags created later by either the administrator or map editor. More detail on how to create a new Tags set is found here
- a number of publicly available Tags sets are available for inclusion on creation of a Photo map and can be selected through the “Populate tags from a Tags set template” pull down
- the publicly available Tags sets have been created by the Bluewren Photos team to assist with tag set up and are listed by project type
- Tag sets created by users can also be saved as templates for use on other Photo maps – these are known as Private templates with more information on how this works found here
- the Tags set selected on creation of a Photo map can be modified later by either the administrator or map editor through clicking on the edit map tags icon after opening the Photo map through the Projects & Maps tab in the Main menu
Classification system – Tags sets
If not set up on Photo map creation Tags sets may be created or amended by the administrator or map editor though the Projects & Maps tab of the main menu.
- after opening the Projects & Maps tab click on the right arrow adjacent to the Project to show the Photo maps within the Project
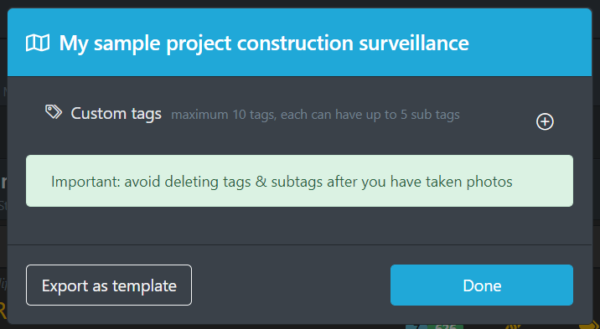
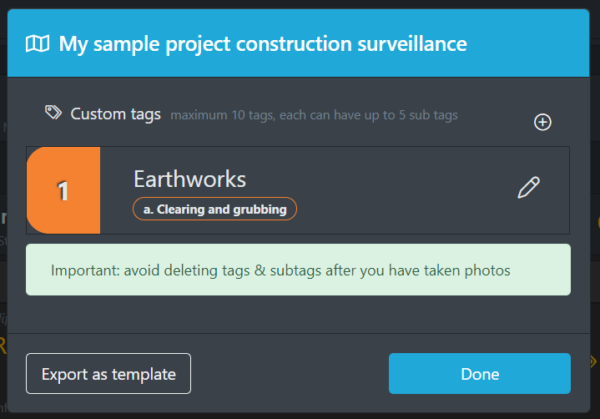
- to the right of the Photo map title you see a number of yellow icons. The second yellow icon shows “edit map tags” on hover and click on this icon will open a pop up with the Photo map title and a plus sign in a circle that on click will open the “New tag” pop-up
- Tags sets may be exported as a template by clicking the “Export as template” button at the bottom left of the pop-up. The exported tag set will appear in the list of tag templates when setting up a Photo map and show as a Private tags set under the Tag template tab
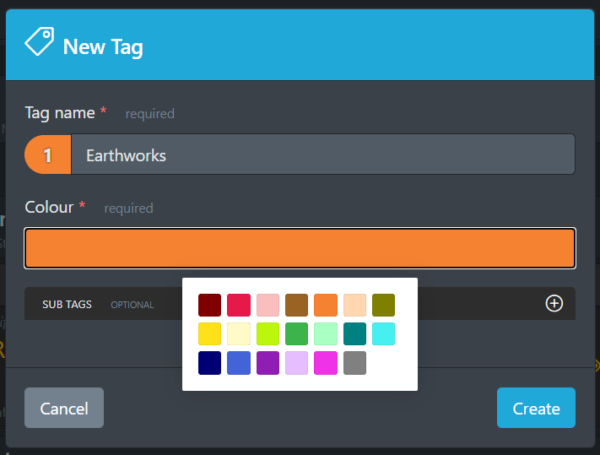
Tag names, colours and sub-tag names can now be entered. Up to 10 tags and 5 sub-tags can be selected. Tag name and colour selection is required, sub-tags are optional and may be added later.
- in the “New Tag” pop-up type in the tag name and select a colour by clicking on the colour bar. A colour swatch pad appears and the desired colour can be chosen with a click. This is the colour that will be associated with the tag and associated sub-tags through all elements of the Suite
- to the right of the sub tags line there is a plus sign in a circle, click on this and and a line appears below where sub-tag labels may be added.
- once the desired number of sub-tags have been added click on the “Create” button to create the tag
- you are returned to the tag listing for the Photo map with the Photo map title now shown at the top of the pop up. The tag and sub-tags are listed with the appropriate colour in the pop up
- to create another tag click in the plus sign in the circle to the right of the Custom tags line
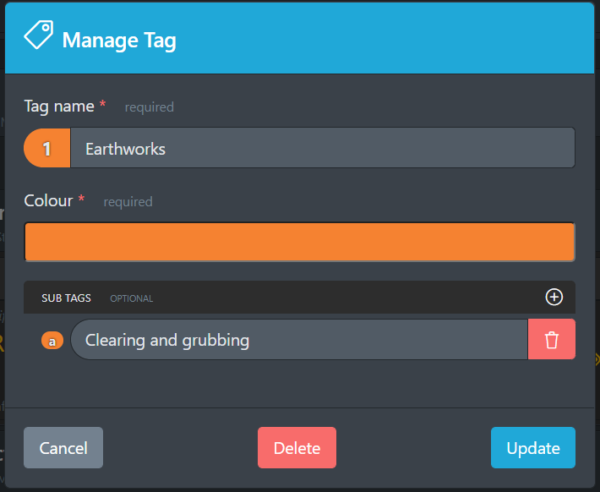
- to edit already created tags or sub-tags, click on the white pen symbol to the right of the tag line. On clicking the white pen symbol the “Manage Tag” pop up allows for amendment to already created tags and sub-tags as shown below
- When finished editing there is the option to use the created tags set as a template for other Photo maps by clicking on the “Export as a template” button at the bottom left. More information on how to access and edit templates is included further below
The “Manage Tag” pop up enables editing of tag and sub-tag names and colour, it also allow for deletion of tags and sub-tags.
Important: avoid deleting tags or sub-tags after pictures have been taken.
- If the tags and sub-tags do not include photos it is possible to delete tags and sub-tags that do not contain any photos
- tags and sub-tags names and colour may be amended at any time, be careful though as changing these may cause confusion if they have been in use for any length of time
- tags and sub-tags may be added at any time. Note that the Photo Record Tool App would need to be refreshed before the added or amended tags or sub-tags appear
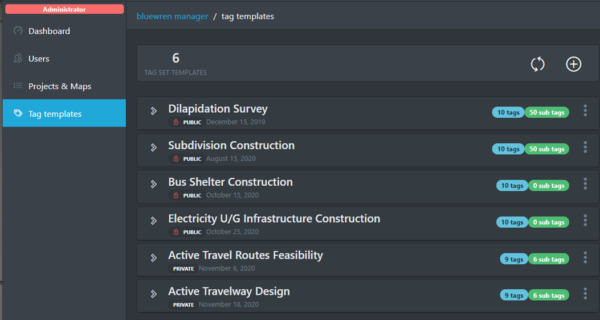

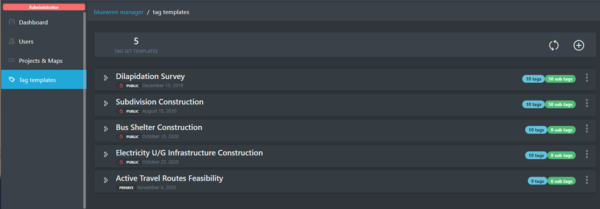
Photo map tags sets may be accessed for editing through the Tag templates tab in the main menu.
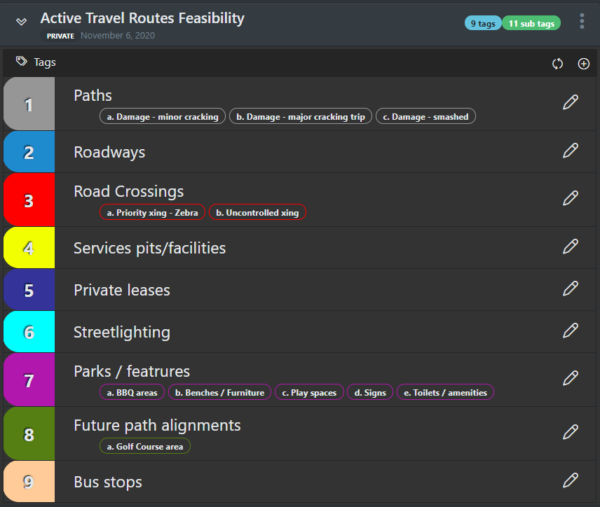
- when opened the Public tags sets created by the Bluewren team appear at the top of the listing. The blue label to the right shows the number of tags and the green label the number of sub-tags within the set.
- Click on the white right arrow to view the Private tags set.
- Clicking on the three dots at the far right of the tags set opens a menu that allows:
- Show / Hide Tags toggles similar to the white right arrow to the left of the tags set name line
- Duplicate Tag Set will copy the tags set to a Private tag set with copy at the end of the name which may be modified to suit specific requirements for use on future Photo map setup.
- Public tag sets can not be edited (shown by the red padlock symbol) however they can be copied when creating a Photo map and then edited and saved as a Private tags set. Refer here for details.
- Tags sets created by people in your company will be flagged as Private tags sets and may be edited as detailed below.
Tags sets may be accessed for editing by either:
- Selecting the Projects & Maps tab in the main menu, opening a Photo map line then clicking on the “edit map tags” yellow icon to activate the “Tag editor pop-up” for editing as described earlier
OR
- opening the Tag templates tab in the main menu
- Private tags sets templates (exported tags sets created by people in your company) may be edited and saved as new tag templates for use on set-up of new Photo maps
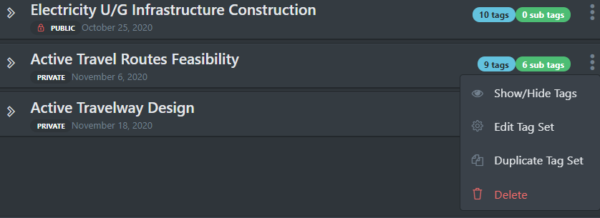
- Clicking on the three dots at the far right of the tags set name line opens a menu with options:
- Show / hide tags toggles on click similar to the white right arrow to the left of the tags set name line
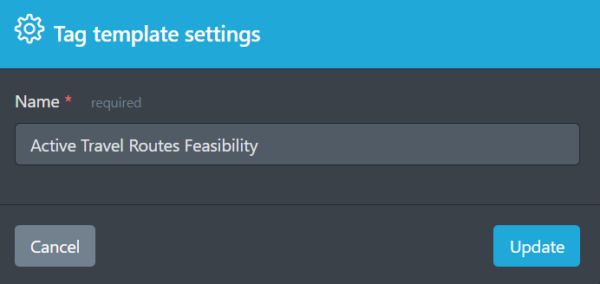
- Edit Tag Set will open a pop-up that allows for the change of the Private tags set name
- Duplicate Tag Set will copy the tags set to a Private tag set with copy at the end of the name which may be modified to suit specific requirements for use on future Photo map setup
- Delete will remove the Private tags set and can not be undone
- tag names, colour and sub-tags may be edited by clicking on the white pen icon and following the steps as outlined earlier
Map settings and positioning
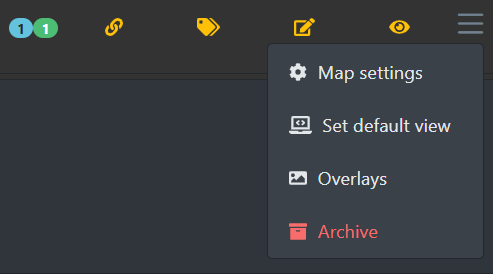
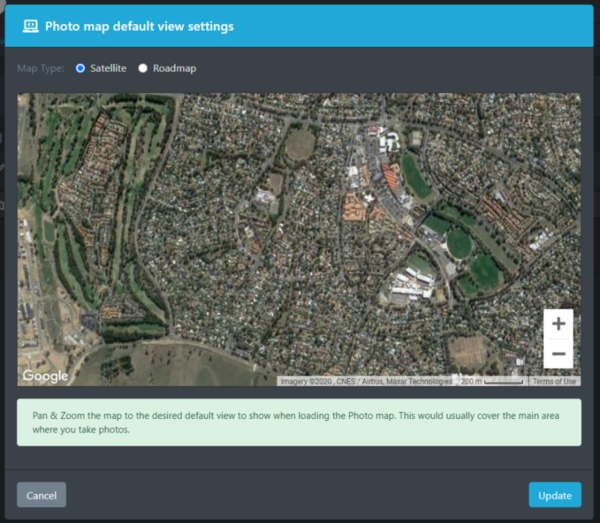
The default position for the Photo map when opened in the Photo Viewer is set through the Projects & Maps tab by selecting the appropriate Photo map listing to reveal the yellow editing icons. At the far right of Photo map name are three bars which when clicked opens a menu:
- select the Set default view setting to open the “photo map default view settings” pop-up
- the aerial map may be zoomed using the + and – buttons and moved by left click and drag to set the desired default position of the Photo map when viewed through the Photo Viewer
- the default Map type shown on the Photo Viewer may be selected as either “Satellite” which is a google satellite image or “Roadmap” from open street maps
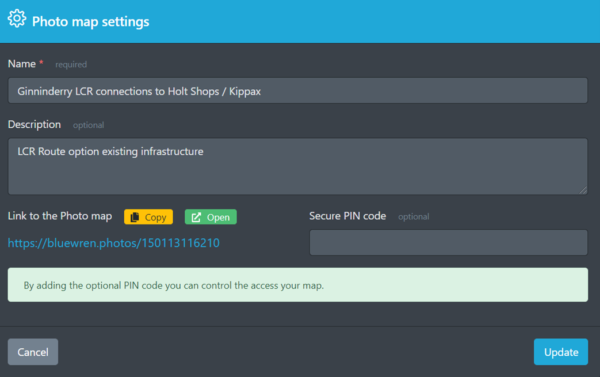
The Photo map name and description and a secure pin may be set for access to the Photo map through the Photo Viewer
- select the Map settings to open the “Photo map settings” pop-up
- the Photo map name and description can be amended by typing into the relevant fields
- the unique link for the Photo map may be copied into the buffer for paste into emails or other documents for access to the Photo map by clicking on the yellow “copy” button.
- to open the Photo map directly in the Photo Viewer click on the green “open” button
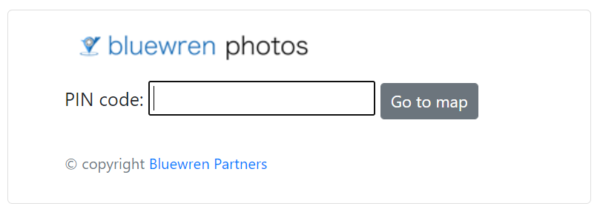
- a “Secure pin code” may be included for the Photo map that must be entered before the Photo map will open as an extra security measure if required in conjunction with the unique link. This enables access to a link to be controlled to select users only at any given time. A four to six digit PIN is recommended
- When a PIN Code is selected a red padlock will appear next to the yellow viewer icon to show the Photo map has the extra layer of security activeated.
Note: The Photo map name appears on the top of the Photo map in the Photo Viewer and the description appears below the Photo map name in the Photo map listing in the Bluewren Manager.
Adding an Overlay and setting initial visibility

Overlays are plan drawings shown at the appropriate spatial position relative to the aerial map. An Overlay may be included for viewing with aerial maps at any time and do not have to form part of initial set up.
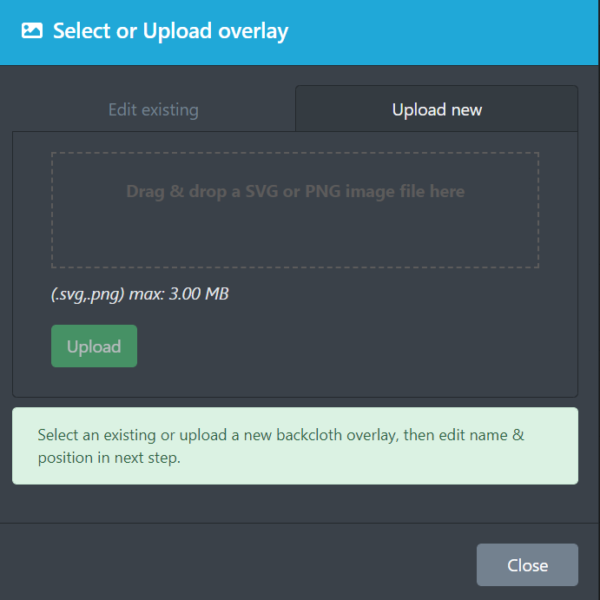
In the Projects & Maps tab select the appropriate Photo map listing to reveal the yellow editing icons. At the far right of Photo map name are three bars which when clicked opens a menu.
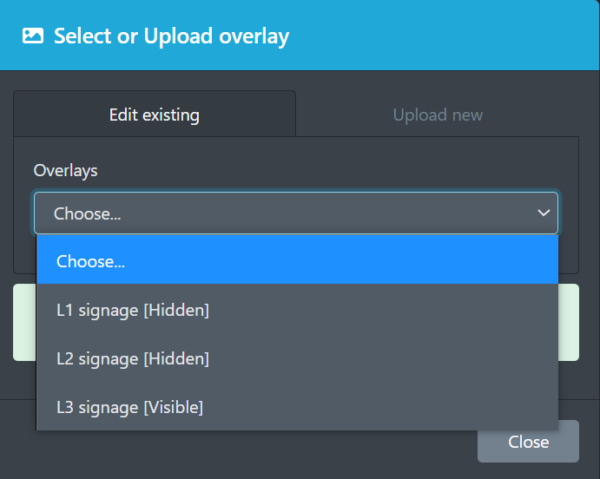
Select Overlays and the “Select or Upload overlay” pop-up appears.
To set up an Overlay:
- select the Upload new tab in the pop-up
- Drag and drop the .svg or .png file into the dashed area.
Next set the position and scale for the overlay by following the instructions from the fourth dot point below.
- select the Edit existing tab in the the “Edit and position overlay” pop-up
- the Overlays already uploaded into the Photo Map including any recently loaded Overlays will be listed on clicking on the “Choose” pull down menu
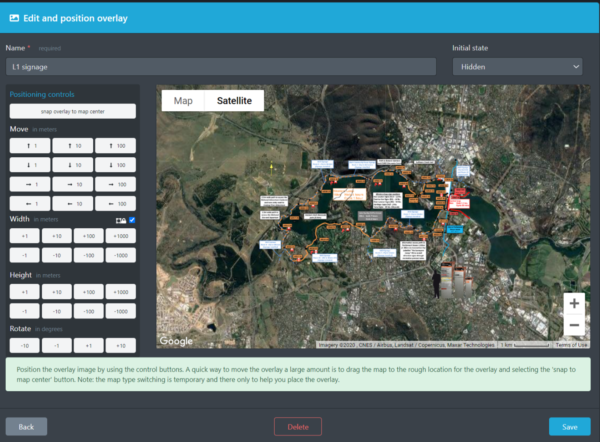
- click on the relevant Overlay and the “Edit and position overlay” pop-up will appear
- the top right box shows the “Initial state” of the Overlay, this pull down menu may be toggled between “Hidden” and “Visible”
- as many Overlays as desired may have an “Intial state” of “Visible”, however more Overlays may adversely delay the loading of the Photo map
To position an overlay
- the Overlay file will be positioned initially in the middle of the default map location
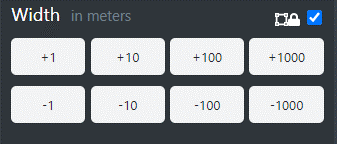
- use the Move, Width and Height buttons to adjust the Overlay by +/-1m, 10m or 100m and Rotate by +/- 1 or 10 degrees
- Using the buttons at the bottom of the pop-up to:
- cancel and changes by clicking on “Back” , or
- “Delete” the overlay, or
- “Save” the amendments
- Clicking the tick box next to the padlock icon on the Width section header will lock the aspect ratio in any “Width” or “Height” adjustments
Photo maps listing line – buttons
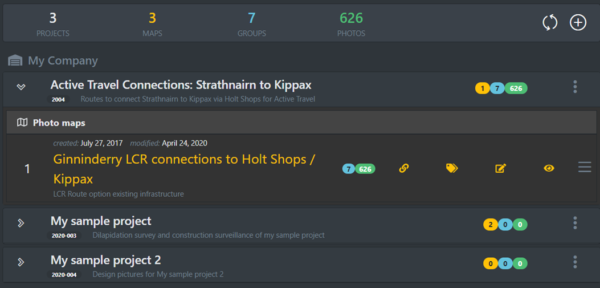
This section explains the options available in the Projects and Maps tab
- Along the top is the Photo maps Summary line that includes key statistics in various colours
- Next is the Project listing line
- When the Project is opened the Photo maps listing lines are displayed
- The cyan and green icons to the left of the line show the number of Photo groups and photos respectively contained in the Photo map
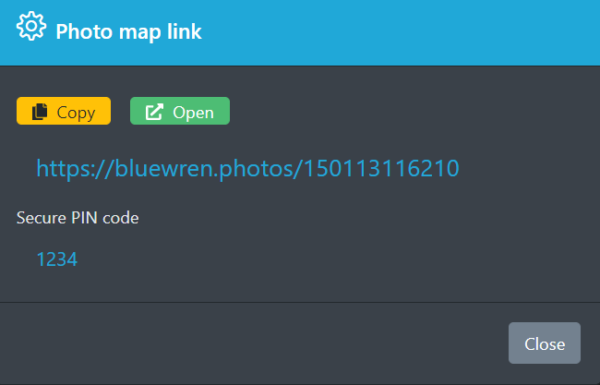
- the show map link icon opens the “Photo map link” pop-up which enables
- the unique link for the photo map may be copied into the buffer for paste into emails or other documents for access to the Photo map by clicking on the yellow “copy” button.
- to open the Photo map directly in the Photo Viewer click on the green “open” button
- the edit map tags button enables editing of map tags, refer here for details
- the edit map photos icon opens the Editing Tool in a separate tab. This tool enables editing of photo group names and notes as well as photo properties and information. More detail on how to use this tool is here

- the view this photo map icon opens the Photo map in the Photo Viewer in a separate tab

- when a PIN is selected the view this photo map icon includes a red padlock
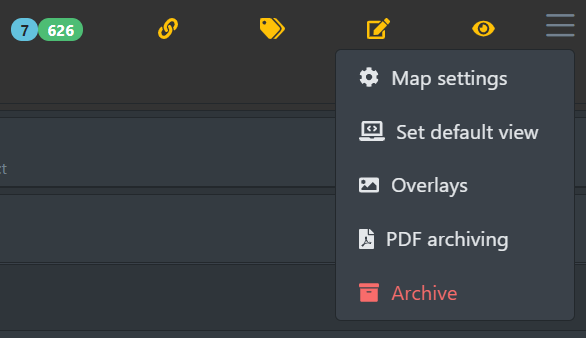
- the three bars on the far right are a pull down menu with options
- Map settings opens the “Photo map settings” pop-up allowing for editing of the Photo map name, description and allows copy of the access link, opening of the Photo map and setting a PIN. More detail is found here
- Set default view opens the “Photo map default view settings” pop-up which allows either an aerial or street map to be selected as the default map base. More detail is found here
- Overlays opens the “Select or upload overlay” pop-up that allows inclusion, positioning and adjustment of previously uploaded overlays. Default visibility on opening a Photo map may also be set. Refer here for more details
- PDF Archiving provides PDF files for each photo group within a photo map. This service can be undertaken at any time during a project or at the completion. Note addtional charges apply for this service
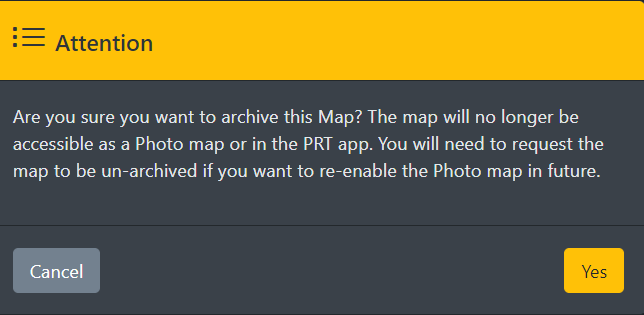
- Archive allows for the archiving of Photo maps including disabling use on both the Photo Record Tool App and the Photo Viewer
- Delete will appear instead of Archive when there are no photos in a Photo map

